Seed Starting Trays Guide: How Much Do Seed Starting Trays Cost?

Feb,26 2025

Seed Starting Trays Cost Guide (2026): Pricing, Setup Steps, Real Use Cases & Money-Saving Strategies

Seed Starting Trays Guide How Much Do Seed Starting Trays Cost

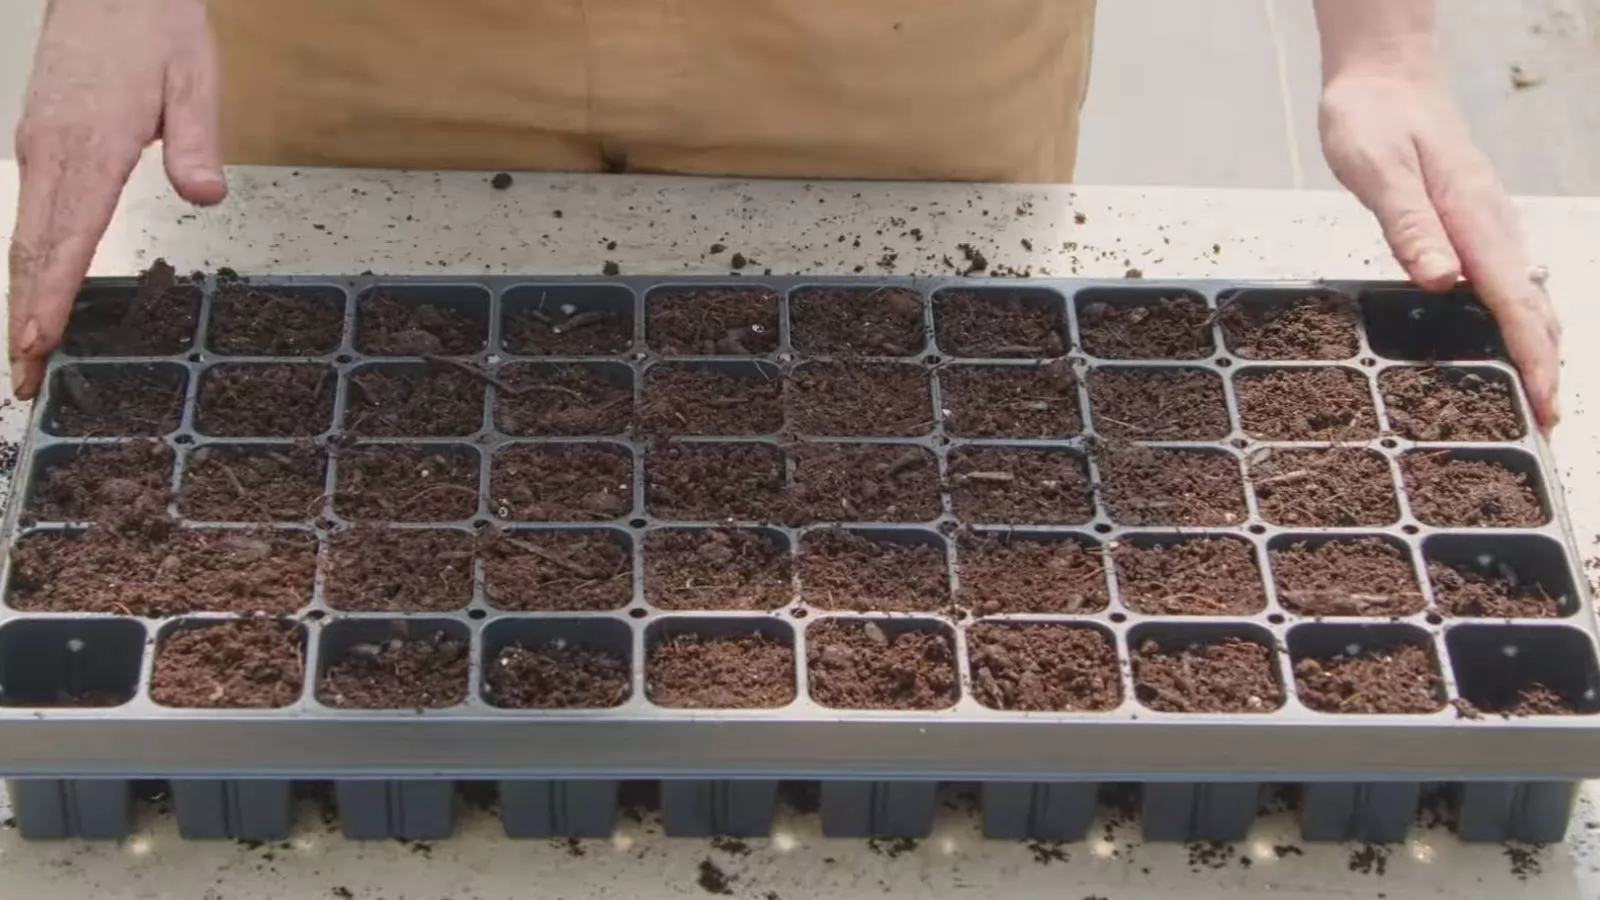
Seed starting trays are the foundation of successful seed germination. But choosing the right tray is not just about price—it’s about matching materials, features, and setup methods to your gardening goals. This upgraded guide goes beyond basic pricing and provides step-by-step instructions, real-world scenarios, troubleshooting solutions, and cost optimization strategies to help you get the best results.

1. Price Breakdown by Tray Type (With Practical Recommendations)

Tray Type Price Range Best Use Case Key Advantage
Basic Plastic $1–$10 Beginners / bulk planting Low cost, reusable
Biodegradable $5–$15 Transplant-sensitive plants No transplant shock
Self-Watering $15–$40 Busy gardeners Reduced watering frequency
Full Kits (Lights + Dome) $20–$60+ Indoor growing Faster germination
DIY Options $0–$5 Budget gardening Free / recyclable

2. Step-by-Step: How to Use Seed Starting Trays Correctly

Step 1: Choose the Right Tray

  • Herbs → 6–12 cells
  • Vegetables → 24–72 cells
  • Commercial scale → 100+ cells

Step 2: Prepare Soil Mix

  • Use lightweight seed-starting mix (not garden soil)
  • Moisten before filling (should feel like a damp sponge)

Step 3: Fill and Plant Seeds

  1. Fill each cell loosely
  2. Press lightly to remove air pockets
  3. Plant seeds at recommended depth (usually 2× seed size)
  4. Label each tray clearly

Step 4: Water Properly

  • Bottom watering is best (prevents fungal issues)
  • Keep soil moist but not soggy

Step 5: Control Environment

  • Temperature: 65–75°F (18–24°C)
  • Humidity dome for early stage
  • Remove dome after sprouting

Step 6: Provide Light

  • South-facing window OR grow lights (12–16 hours/day)

Step 7: Transplant at Right Time

  • 2–3 true leaves stage
  • Harden off before outdoor planting

3. Real-World Use Cases (From Beginners to Commercial Growers)

Case 1: Home Gardener (Budget Setup)

A beginner used DIY egg cartons and achieved 80% germination for herbs. Cost: $0. Limitation: weak root space.

Case 2: Urban Indoor Grower

Used a $30 self-watering kit with LED lights. Result: faster germination and consistent moisture control.

Case 3: Small Farm Operation

Used 100+ cell trays with bottom watering system. Result: improved efficiency and reduced labor time by 40%.

4. Common Problems & Proven Solutions

Problem 1: Seeds Not Germinating

  • Cause: Wrong temperature or dry soil
  • Solution: Use heat mat + consistent moisture

Problem 2: Mold or Fungus Growth

  • Cause: Overwatering + poor airflow
  • Solution: Remove humidity dome early + improve ventilation

Problem 3: Weak / Leggy Seedlings

  • Cause: Insufficient light
  • Solution: Add grow lights closer to plants (2–3 inches)

Problem 4: Roots Getting Stuck

  • Cause: Cheap trays with poor drainage
  • Solution: Upgrade to sturdy trays with proper holes

5. Cost Optimization: How to Save Without Sacrificing Results

1. Buy in Bulk

Reduce per-tray cost by up to 40%

2. Reuse Trays Safely

  • Clean with 1:9 bleach solution
  • Dry completely before reuse

3. DIY Smartly

  • Egg cartons for short-term use
  • Yogurt cups for durable DIY trays

4. Skip Unnecessary Features

  • Avoid overpriced kits if you already have light and heat

5. Buy Off-Season

  • Winter discounts up to 40%

6. Advanced Tips for Higher Germination Rates

  • Pre-soak seeds for faster sprouting
  • Use sterile soil mix to prevent disease
  • Rotate trays daily for even light exposure
  • Use bottom trays to maintain consistent moisture

7. 2026 Trends in Seed Starting Systems

  • Eco-Friendly Materials: Coir and compostable trays gaining popularity
  • Smart Systems: Automated watering and lighting
  • Compact Gardening: Vertical tray systems for small spaces

8. Best Choice by Gardener Type

Gardener Type Recommended Solution Budget
Beginner DIY or basic plastic trays $0–$10
Home Grower Self-watering tray kit $15–$30
Serious Hobbyist Tray + dome + light setup $30–$60
Commercial Grower High-capacity tray system $100+

Conclusion

Seed starting trays range from free DIY options to professional systems over $200, but the key is not spending more—it’s choosing the right system and using it correctly. With proper setup, even a $5 tray can outperform expensive kits.

Explore high-quality seed starting trays and build a system that fits your gardening goals and budget.

FAQ

What is the best tray type for beginners?

Basic plastic trays or DIY containers are the easiest and cheapest starting point.

How many times can trays be reused?

High-quality trays can last 3–5 seasons with proper cleaning.

Do I really need a humidity dome?

Only during germination. Remove after seedlings appear to prevent mold.

Are expensive kits worth it?

Only if you need automation (lighting, watering). Otherwise, basic setups work well.

Contact us now for product inquiries and bulk pricing.

0 Comments
Leave a Comment
Your email address will not be published. Required fields are marked *
Submit Comment
Set A Consultation Today
*We respect your confidentiality and all information are protected.
send
You Might Also Like...
Contact Us
Contact Us
Keep In Touch
Send
accept cookies
reject all

We use cookies to make the website work, to provide advanced features, social media and traffic analysis, and we use analytics and third-party advertising cookies. If you choose to click "Deny All", you will retain the default setting of not allowing the use of cookies or other tracking tools other than technical tools.

Enter your inquiry details, we will reply you in 24 hours.
Send