

sales@zjlinkwin.com

Mobile
+86 15706104016


sales@zjlinkwin.com
Mobile
+86 15706104016
Seed starter trays with domes are essential tools for gardeners, creating a controlled environment that promotes successful seed germination by maintaining warmth, humidity, and moisture. These trays, typically equipped with individual cells, a bottom tray for water, and a clear plastic dome, act as mini-greenhouses to optimize seedling growth. This guide provides a streamlined explanation of how to use seed starter trays with domes effectively, covering preparation, planting, maintenance, and transplanting for both beginners and experienced gardeners.
To begin, gather your materials: a seed starter tray with a dome, sterile seed starting mix, high-quality seeds, a watering can or spray bottle, labels, a marker, and a light source (natural sunlight or grow lights). If available, a heat mat can help maintain consistent soil temperatures for warmth-loving seeds like tomatoes or peppers. If reusing the tray, clean it thoroughly with warm, soapy water, rinse, and sanitize with a diluted bleach solution (1 part bleach to 9 parts water) to prevent mold or disease. Fill the tray’s cells with pre-moistened seed starting mix, which should be damp but not soggy, pressing lightly to eliminate air pockets while avoiding over-compaction. Level the surface to ensure an even planting base.
Check the seed packet for specific instructions on planting depth, spacing, and germination requirements, as these vary by plant type. Sow 1–2 seeds per cell to increase the chances of successful germination, using a pencil or dibber to create small holes at the recommended depth (typically 1–2 times the seed’s diameter). Cover the seeds gently with the mix and label each section with the seed type and planting date for easy tracking. Water the seeds carefully using a spray bottle or a watering can with a fine rose to avoid displacing them. Alternatively, use bottom watering by placing the tray in a shallow layer of water (about 1/4 inch) for 10–15 minutes, allowing the soil to absorb moisture through drainage holes, then remove excess water to prevent over-saturation.
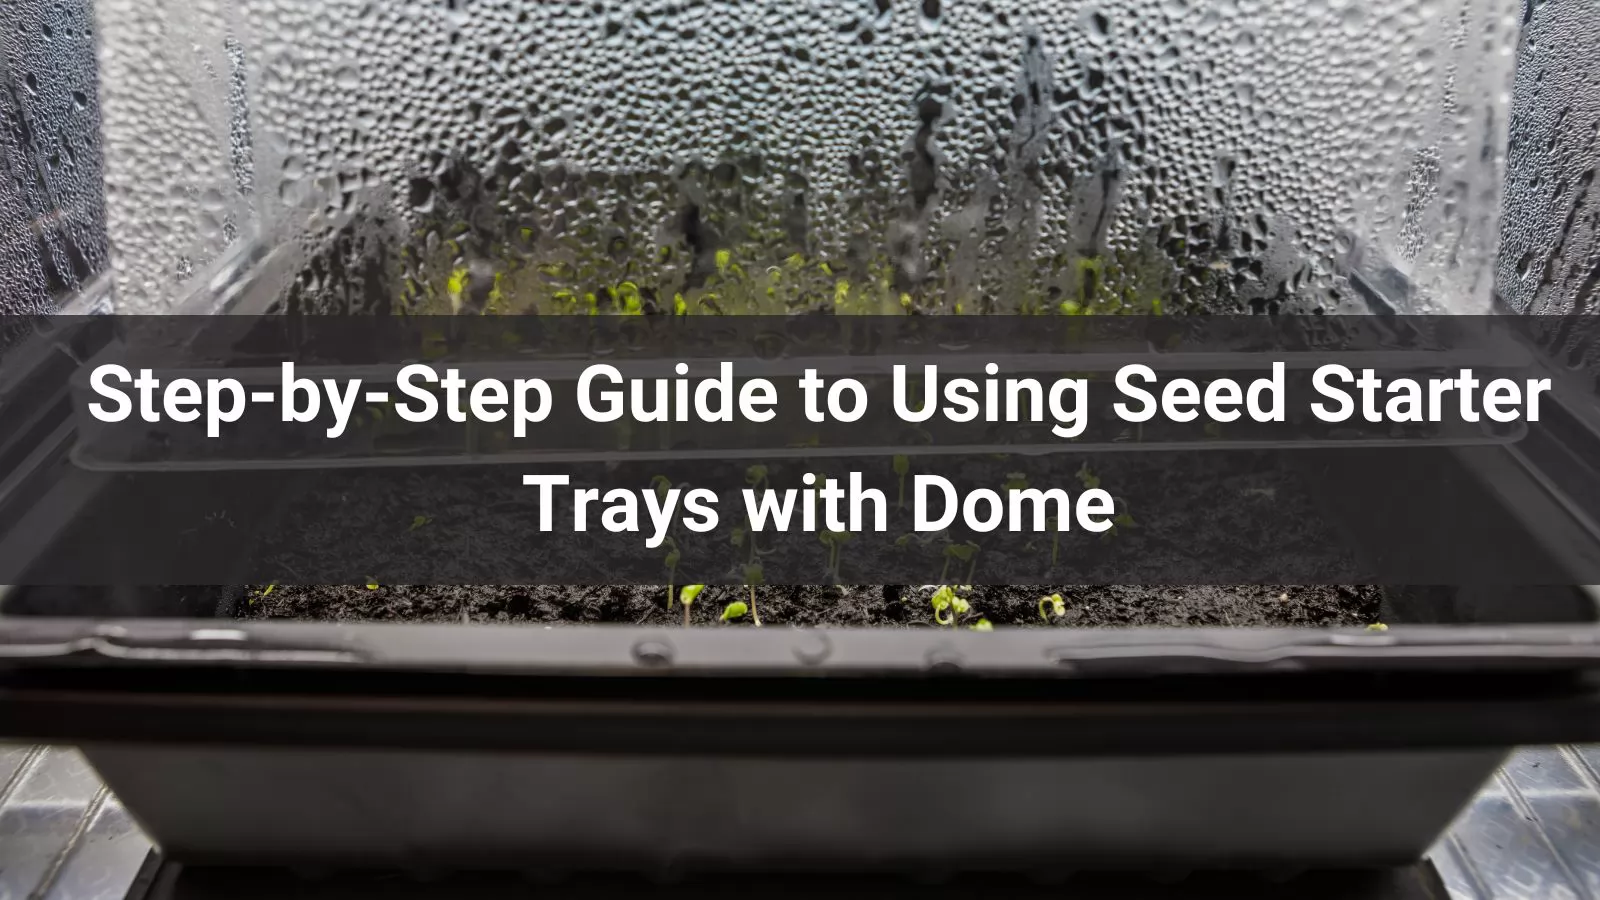
Place the clear plastic dome over the tray to trap humidity and warmth, creating an ideal germination environment. If the dome has adjustable vents, keep them closed initially to maintain high humidity (80–90%), but monitor for excessive condensation, which may require slight venting to prevent mold. Position the tray in a warm location, ideally between 70–80°F (21–27°C), as specified on the seed packet, avoiding direct sunlight to prevent overheating. A heat mat can be used for seeds requiring higher temperatures. Check the soil daily to ensure it remains moist but not waterlogged, using a spray bottle or bottom watering as needed. Most seeds germinate within 5–14 days, depending on the plant type.
Once seedlings emerge with their first leaves (cotyledons), gradually reduce humidity to acclimate them to normal conditions. Open the dome’s vents for 1–2 days, then remove the dome entirely over 2–3 days to avoid shocking the plants. Move the tray to a bright location with 12–16 hours of light daily, either near a south-facing window with indirect sunlight or under grow lights positioned 2–6 inches above the seedlings. Adjust light height as plants grow to prevent legginess. If multiple seedlings sprout in one cell, snip the weaker ones at soil level, leaving the strongest. Keep the soil consistently moist, and once true leaves (the second set) appear, consider applying a diluted liquid fertilizer (1/4 strength) every 1–2 weeks. Ensure good air circulation to prevent fungal issues like damping-off.
Seedlings are ready for transplanting when they have 2–4 true leaves and visible roots through the drainage holes, typically 2–4 weeks after germination. Before moving them to pots or a garden bed, harden them off by gradually exposing them to outdoor conditions over 7–10 days, starting in a shaded, protected area and increasing exposure daily. To transplant, gently remove seedlings from the cells, holding them by the leaves to avoid stem damage. Plant them in appropriate soil at the correct depth and spacing, as indicated by the seed packet, and water thoroughly. Provide shade for a few days if transplanting outdoors to ease the transition.
For best results, select tray cell sizes based on seed type—smaller cells for small seeds like lettuce and larger ones for seeds like pumpkins. Prevent mold by ensuring good air circulation and avoiding overwatering. Use a heat mat for warmth-loving plants, and keep detailed records of planting and germination for future reference. Clean and sterilize trays after use to prevent disease. Common mistakes include overwatering, which can cause root rot; insufficient light, leading to leggy seedlings; leaving the dome on too long, risking fungal issues; planting seeds at incorrect depths; and ignoring temperature requirements, which can delay or prevent germination.
Seed starter trays with domes are versatile for growing vegetables (e.g., tomatoes, peppers, lettuce), herbs (e.g., basil, cilantro), flowers (e.g., marigolds, zinnias), and microgreens. Their ability to maintain optimal germination conditions makes them ideal for home gardeners and commercial growers alike. By following these steps—preparing the tray, planting and watering correctly, maintaining proper conditions, and transplanting carefully—you can achieve healthy, robust seedlings ready for further growth. For additional gardening resources or product details, such as MIHARMLE seed starter trays, consult trusted suppliers or visit Linkwin for general inquiries. With proper use, seed starter trays with domes are a reliable, cost-effective tool for successful plant propagation.


We use cookies to make the website work, to provide advanced features, social media and traffic analysis, and we use analytics and third-party advertising cookies. If you choose to click "Deny All", you will retain the default setting of not allowing the use of cookies or other tracking tools other than technical tools.


.png)

.png)


.png)